Semi Truck Parts Names and Pictures: A Comprehensive Guide
Discover detailed semi truck parts names and pictures within comprehensive PDF manuals‚ offering insights into anatomy‚ systems‚ and diagrams for effective maintenance and repair.
Understanding a semi-truck’s complex anatomy begins with identifying key components via detailed parts names and pictures‚ often found in accessible PDF guides. These resources illustrate the engine‚ drivetrain‚ suspension‚ and braking systems. Comprehensive diagrams showcase each part’s location and function‚ aiding in diagnostics and repairs. Exploring these PDFs provides a foundational knowledge base for both professionals and enthusiasts‚ ensuring safe and efficient operation.
The Engine: Powering the Beast
The diesel engine‚ the heart of a semi-truck‚ is meticulously detailed in parts names and pictures PDFs. These guides dissect diesel engine components – from pistons and crankshafts to turbochargers and fuel injectors – with labeled diagrams. Understanding these parts‚ their functions‚ and locations is crucial for maintenance‚ troubleshooting‚ and maximizing engine performance‚ as illustrated in readily available manuals.
Diesel Engine Components
Detailed semi truck parts names and pictures PDFs showcase crucial components like the cylinder head‚ block‚ pistons‚ connecting rods‚ and camshaft. These resources provide exploded views‚ identifying each part with precision. Understanding the interplay of these components – fuel injectors‚ valves‚ and the cooling system – is vital for diagnosing issues and performing effective repairs‚ as shown in comprehensive diagrams.
Engine Control Systems
Semi truck parts names and pictures PDFs illustrate complex Engine Control Systems (ECS). These diagrams detail components like the Engine Control Module (ECM)‚ sensors (MAP‚ O2‚ temperature)‚ and actuators. Understanding these systems – fuel management‚ ignition timing‚ and emissions control – requires visual aids found in detailed manuals‚ aiding in troubleshooting and optimizing engine performance for modern diesel trucks.
Drivetrain: Transferring Power
Semi truck parts names and pictures PDFs showcase the drivetrain’s crucial role. These resources detail components like the clutch‚ transmission‚ driveshaft‚ and axles. Visual guides help identify parts for repair or upgrades. Understanding the power flow – from engine to wheels – is simplified with detailed diagrams found within comprehensive truck anatomy manuals.
Transmission Types & Parts
Semi truck parts names and pictures PDFs illustrate various transmission types – manual‚ automated manual‚ and automatic. Detailed breakdowns showcase gears‚ shafts‚ synchronizers‚ and housings. Diagrams aid in identifying specific components for maintenance. These visual guides‚ often found in truck anatomy manuals‚ are invaluable for understanding transmission function and repair procedures.
Drive Axles & Differentials
Semi truck parts names and pictures PDFs clearly depict drive axle and differential components. These include housings‚ gears (ring‚ pinion‚ and spider)‚ carriers‚ and bearings. Diagrams within truck anatomy guides illustrate power transfer. Identifying these parts via visual references aids in troubleshooting and repair‚ ensuring optimal drivetrain performance and longevity.
Suspension System: Ensuring a Smooth Ride
Semi truck parts names and pictures PDFs showcase suspension components like springs‚ shocks‚ and air suspension systems. Detailed diagrams illustrate leaf spring‚ coil spring‚ and air bag arrangements. These resources aid in identifying parts for repair or upgrades‚ contributing to a smoother‚ safer ride and protecting cargo during transport‚ as shown in anatomy guides.
Springs & Shock Absorbers
Semi truck parts names and pictures PDFs clearly label leaf springs‚ coil springs‚ and shock absorbers. Diagrams detail their function in absorbing road impacts and maintaining stability. Identifying these components via visual guides simplifies replacement and ensures proper load support. Manuals often include specifications for load capacity and proper installation procedures.
Air Suspension Systems
Semi truck parts names and pictures PDFs illustrate air suspension components like air bags‚ compressors‚ height control valves‚ and leveling systems. Detailed diagrams showcase how these parts work together to provide a smoother ride and adjustable ride height. Manuals aid in troubleshooting leaks and understanding system operation for optimal performance.
Braking System: Safety First

Semi truck parts names and pictures PDFs extensively cover braking systems‚ detailing air brake components – chambers‚ lines‚ and valves. Diagrams illustrate ABS functionality‚ crucial for safety. Manuals provide schematics for troubleshooting‚ maintenance‚ and understanding brake adjustments‚ ensuring optimal stopping power and adherence to safety regulations.
Air Brake Components
Semi truck parts names and pictures PDFs meticulously detail air brake components: reservoirs‚ compressors‚ and control valves. Diagrams showcase brake chambers‚ air lines‚ and treadle valves. Manuals offer exploded views for easy identification‚ aiding in repairs and maintenance. Understanding these parts is vital for safe operation and regulatory compliance.
ABS (Anti-lock Braking System)
Semi truck parts names and pictures PDFs illustrate ABS components – wheel speed sensors‚ the electronic control unit (ECU)‚ and modulator valves. Diagrams clarify how these parts prevent wheel lockup during braking. Manuals detail troubleshooting steps and system operation‚ crucial for maintaining optimal stopping power and vehicle stability.
Steering System: Controlling the Direction
Semi truck parts names and pictures PDFs showcase the steering gearbox‚ power steering pump‚ hydraulic lines‚ and steering linkages. Detailed diagrams within manuals explain component functions and relationships. These resources aid in identifying parts for repair and understanding the system’s role in directional control and driver safety.
Steering Gearbox
Semi truck parts names and pictures PDFs illustrate the steering gearbox’s internal components – gears‚ housings‚ and seals. Manuals detail its function: converting rotational motion to linear motion‚ steering the wheels. Diagrams aid identification of parts during rebuilds or replacements‚ ensuring proper functionality and directional control.

Power Steering Components
Semi truck parts names and pictures PDFs showcase power steering’s key elements: pumps‚ hoses‚ cylinders‚ and valves. Diagrams clarify how hydraulic pressure assists steering‚ reducing driver effort. Manuals detail component locations and functions‚ aiding in troubleshooting and repair‚ ensuring smooth and responsive vehicle control and maneuverability.
Electrical System: The Nervous System
Semi truck parts names and pictures PDFs illustrate the complex electrical network. These manuals detail batteries‚ alternators‚ wiring harnesses‚ and control modules. Diagrams pinpoint component locations‚ aiding diagnostics and repair. Understanding this “nervous system” is crucial for safe operation‚ utilizing schematics for efficient troubleshooting and maintenance.

Batteries & Alternators
Semi truck parts names and pictures PDFs showcase battery types (starting‚ auxiliary) and alternator specifications. Diagrams detail connections and testing procedures. Manuals explain charging systems‚ voltage regulation‚ and common failure points. Identifying correct parts via images ensures proper replacement‚ maintaining reliable power for all electrical components.
Wiring Harness & Control Modules
Semi truck parts names and pictures PDFs illustrate complex wiring harness layouts and control module locations. Schematics detail pinouts and circuit diagrams for troubleshooting. Manuals explain module functions (ECM‚ ABS‚ etc.). Identifying components via images aids in repair‚ ensuring correct connections and preventing electrical system failures.
Cab Components: The Driver’s Domain
Semi truck parts names and pictures PDFs showcase detailed cab interiors‚ identifying dashboard instruments‚ seating‚ and control layouts. Diagrams illustrate component placement for repair access. Manuals cover everything from steering wheel assemblies to climate control systems‚ aiding in maintenance and ensuring driver comfort and operational efficiency.

Dashboard & Instrumentation
Semi truck parts names and pictures PDFs provide labeled diagrams of the dashboard‚ detailing gauges (speedometer‚ tachometer)‚ warning lights‚ and control switches. Manuals explain functionality and troubleshooting for each instrument. These resources aid in understanding vital truck data‚ ensuring safe operation and efficient diagnostics during maintenance procedures.
Seating & Interior Features
Semi truck parts names and pictures PDFs illustrate cab interiors‚ identifying driver and passenger seating‚ sleeper berth components‚ and control layouts. Diagrams detail features like adjustable seats‚ storage compartments‚ and climate control systems. Manuals assist in understanding interior functionality‚ repair‚ and replacement of parts for driver comfort and safety.
Trailer Components: Hauling the Load
Semi truck parts names and pictures PDFs showcase trailer anatomy‚ detailing the frame‚ suspension‚ landing gear‚ and kingpin. Diagrams illustrate component connections and functions‚ aiding in understanding load distribution and securement. Manuals provide parts lists and repair guidance for trailer maintenance‚ ensuring safe and efficient hauling operations.
Trailer Frame & Suspension
Semi truck parts names and pictures PDFs extensively cover trailer frame construction and suspension systems. Detailed diagrams illustrate components like crossmembers‚ longmembers‚ and various suspension types. Manuals offer parts breakdowns for springs‚ axles‚ and hangers‚ crucial for maintaining structural integrity and a smooth‚ stable ride during transport.

Landing Gear & Kingpin
Semi truck parts names and pictures PDFs provide detailed views of landing gear mechanisms and kingpin assemblies. These crucial components‚ enabling trailer support and connection‚ are thoroughly documented. Manuals showcase parts lists‚ exploded diagrams‚ and maintenance procedures for safe and secure trailer handling‚ ensuring operational efficiency.

Body Parts & Diagrams
Semi truck parts names and pictures PDFs feature extensive body component diagrams‚ including subframes and cargo floors (Utilivan & Truck Body types). These manuals illustrate part locations‚ assembly details‚ and repair procedures. Accessing these diagrams aids in identifying components and understanding the truck’s structural integrity for maintenance or rebuilds.
Subframe and Cargo Floor (Utilivan)
Semi truck parts names and pictures PDFs dedicated to Utilivan models detail the subframe’s construction and cargo floor assembly. Diagrams showcase mounting points‚ crossmembers‚ and floor panel configurations. These resources are crucial for repairs‚ modifications‚ or when sourcing replacement parts for the Utilivan’s specialized body structure.
Subframe and Cargo Floor (Truck Body)
Semi truck parts names and pictures PDFs focusing on standard truck bodies illustrate the subframe’s role in supporting the cargo floor. Detailed schematics reveal frame rail connections‚ floor joist arrangements‚ and decking materials. These manuals aid in identifying components for repairs‚ ensuring structural integrity‚ and proper load distribution.
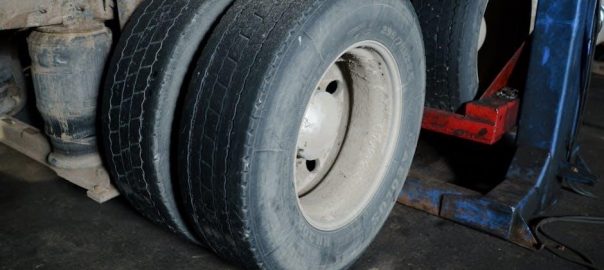
Tires & Wheels: Connecting to the Road
Semi truck parts names and pictures PDFs extensively cover tire types – radial‚ bias-ply – and load ranges. Wheel sections detail materials‚ construction (steel‚ aluminum)‚ and mounting specifics. Diagrams illustrate proper tire/wheel assemblies‚ valve stem locations‚ and crucial safety guidelines for inspection and maintenance‚ ensuring optimal road performance.
Tire Types & Sizes
Semi truck parts names and pictures PDFs meticulously detail tire classifications: highway‚ all-position‚ drive‚ and steer. Size designations (e.g.‚ 295/75R22.5) are explained‚ alongside load index and speed ratings. Charts illustrate appropriate tire choices based on application‚ weight capacity‚ and road conditions‚ vital for safety and efficiency.
Wheel Materials & Construction
Semi truck parts names and pictures PDFs showcase wheel construction – typically steel‚ though aluminum alloys are common for weight reduction. Diagrams illustrate multi-piece vs. single-piece designs‚ stud patterns‚ and offset specifications. Manuals detail material strengths‚ load ratings‚ and proper torque procedures for safe wheel mounting and maintenance‚ crucial for preventing failures.
Lighting System: Visibility & Safety
Semi truck parts names and pictures PDFs extensively cover lighting‚ detailing headlights‚ taillights‚ turn signals‚ and marker lights. Diagrams illustrate wiring schematics and bulb types. Manuals emphasize compliance with safety regulations‚ proper lens maintenance‚ and troubleshooting common lighting failures‚ ensuring optimal visibility and preventing accidents on the road.
Headlights & Taillights

Semi truck parts names and pictures PDFs provide detailed breakdowns of headlight and taillight assemblies. These resources showcase bulb specifications (LED‚ halogen)‚ reflector designs‚ and lens materials. Diagrams illustrate proper alignment procedures and replacement steps‚ crucial for maximizing visibility and adhering to DOT regulations for safe operation.
Turn Signals & Marker Lights
Semi truck parts names and pictures PDFs extensively cover turn signals and marker lights‚ vital for communication on the road. These guides detail bulb types‚ wiring schematics‚ and mounting locations‚ ensuring compliance with legal requirements. Diagrams illustrate proper function and troubleshooting steps for maintaining optimal signaling and visibility.
Fuel System: Supplying the Engine
Semi truck parts names and pictures PDFs provide detailed breakdowns of the fuel system. These resources illustrate fuel tanks‚ lines‚ filters‚ and pumps‚ crucial for engine operation. Diagrams showcase component locations and connections‚ aiding in diagnostics and repair. Manuals detail specifications and maintenance procedures for optimal fuel delivery.
Fuel Tanks & Lines
Semi truck parts names and pictures PDFs clearly identify fuel tank types‚ capacities‚ and mounting configurations. Detailed diagrams illustrate fuel line routing‚ connections‚ and materials. These resources showcase components like fuel caps‚ vents‚ and shut-off valves. Manuals aid in identifying proper parts for replacement and ensuring safe fuel handling practices;
Fuel Filters & Pumps
Semi truck parts names and pictures PDFs provide detailed views of various fuel filter designs and pump mechanisms. Diagrams illustrate the location and function of components like fuel lift pumps‚ transfer pumps‚ and high-pressure pumps. Manuals assist in identifying correct filter types and understanding pump operation for optimal engine performance.
Exhaust System: Managing Emissions
Semi truck parts names and pictures‚ found in detailed PDFs‚ showcase the exhaust system’s components. Diagrams illustrate the muffler‚ tailpipe‚ and crucial Diesel Particulate Filters (DPF). Manuals explain DPF regeneration and emission control systems‚ aiding in understanding and maintaining compliance with environmental regulations for cleaner operation.
Muffler & Tailpipe
Semi truck parts names and pictures in PDF guides clearly identify the muffler and tailpipe. These diagrams detail their construction and placement within the exhaust system. Manuals explain their function in reducing noise and safely directing exhaust gases‚ crucial for both driver comfort and environmental compliance during operation.

Diesel Particulate Filter (DPF)
Semi truck parts names and pictures PDFs showcase the Diesel Particulate Filter (DPF) as a key emissions control component; Diagrams illustrate its location and internal structure. Manuals detail how the DPF traps soot‚ requiring periodic regeneration to maintain optimal engine performance and adhere to environmental regulations‚ vital for modern diesel trucks.
Resources for Parts Diagrams & Manuals
Semi truck parts names and pictures are readily available through online catalogs and downloadable PDF manuals. These resources‚ like those from fleetsworld and parts diagrams‚ provide detailed schematics and parts lists. Accessing these guides simplifies identification‚ troubleshooting‚ and ordering of replacement components for efficient truck maintenance and repair.
Online Parts Catalogs
Numerous online parts catalogs offer semi truck parts names and pictures‚ streamlining the identification process. These digital resources frequently include exploded diagrams and detailed specifications‚ aiding in accurate part selection. Websites provide searchable databases‚ often with PDF manual links‚ for convenient access to component information and ordering.
PDF Manuals & Schematics
Comprehensive PDF manuals and schematics are invaluable resources for semi truck parts names and pictures. These documents detail truck anatomy‚ component functions‚ and often include exploded views. Accessing these guides aids in understanding complex systems‚ troubleshooting issues‚ and ensuring correct part identification for repairs and maintenance.