Skyrim Cookbook PDF: A Comprehensive Guide
Dive into Tamriel’s flavors! This guide explores the Skyrim Cookbook PDF, offering a legendary culinary experience for fans, with easy download options․
Discover regional recipes, from hearty Nordic stews to delicate Elven pastries, all meticulously recreated for your kitchen․ Explore the official and fan-made versions!
Welcome, adventurer, to the realm of culinary delights inspired by The Elder Scrolls V: Skyrim! The Skyrim Cookbook isn’t merely a collection of recipes; it’s a portal to Tamriel, bringing the iconic foods and beverages of the game to life in your very own kitchen․
This guide serves as your companion, navigating the world of the Skyrim Cookbook PDF, exploring its origins, content, and how to best utilize it․ Whether you’re a seasoned chef or a novice cook, prepare to embark on a gastronomic journey filled with hearty Nordic fare, sweet treats, and everything in between․ From Sweetrolls to Apple Cabbage Stew, the possibilities are endless․ Discover how to download, adapt, and enjoy these legendary recipes!
Prepare to become a culinary champion!
What is the Skyrim Cookbook?
The Skyrim Cookbook is an officially licensed culinary companion to the beloved video game, The Elder Scrolls V: Skyrim․ Published by Insight Editions, it’s a beautifully illustrated book featuring over 70 recipes inspired by the food and drink mentioned within the game’s vast world of Tamriel․
Available in both physical and PDF formats, the cookbook aims to recreate the flavors of Skyrim, offering dishes ranging from simple travel rations to elaborate feasts fit for a Jarl․ It’s designed for fans eager to immerse themselves further into the game’s lore and experience a taste of its culture․ The PDF version provides convenient access to these recipes, allowing cooks to easily follow along while preparing their culinary creations․ It truly captures the diversity of Tamriel!
The Cookbook’s Connection to the Game
The Skyrim Cookbook isn’t merely a collection of recipes; it’s a direct extension of the game’s immersive world․ Each dish is rooted in the lore of The Elder Scrolls V: Skyrim, drawing inspiration from in-game items, character dialogue, and regional specialties․
Recipes like Sweetrolls, Apple Cabbage Stew, and Honningbrew Mead are directly referenced within the game, allowing fans to recreate iconic culinary experiences․ The cookbook meticulously details the origins of each dish, connecting them to specific locations, cultures, and characters within Skyrim․ The PDF format allows players to enhance their roleplaying experience, truly embodying the life of a Dragonborn through authentic culinary adventures․ It’s a delicious way to deepen your connection to Tamriel!
Finding the Skyrim Cookbook PDF
Locate the Skyrim Cookbook PDF through official sources or explore online options, but beware of risks associated with unofficial download sites․
Official Sources for Download
Securing your Skyrim Cookbook PDF begins with exploring legitimate sources․ The most reliable path is through official retailers like Amazon, where the physical copy often includes a digital PDF version with purchase․ Checking the publisher’s website, Insight Editions, is also crucial; they frequently offer direct download links or promotions․
Furthermore, authorized ebook platforms such as Google Play Books or Kobo may host the official PDF․ These platforms guarantee a safe download, free from malware or corrupted files․ Always verify the seller’s authenticity before completing a transaction to avoid scams․ Remember, supporting official channels ensures continued content creation and quality for future culinary adventures in Tamriel!
Direct links, like the one found on ardbark․com, can also provide access, but always exercise caution and verify the site’s security․
Unofficial Sources and Risks
Navigating the web for a Skyrim Cookbook PDF often leads to unofficial sources, presenting significant risks․ Websites offering “free” downloads frequently harbor malware, viruses, or corrupted files that can compromise your device’s security․ These files could steal personal information or damage your system․
Torrent sites and file-sharing platforms are particularly dangerous, often distributing illegal copies bundled with harmful software․ Even seemingly legitimate forums can unknowingly host compromised PDFs․ Anyflip, while offering access, doesn’t guarantee file safety․ Prioritize caution; a free download isn’t worth the potential cost of a security breach․
Always scan any downloaded file with a reputable antivirus program before opening it, and consider the legal implications of obtaining content illegally․
Legality of Downloading the PDF
Downloading the Skyrim Cookbook PDF raises important legal considerations․ Obtaining the PDF from unofficial sources, such as torrent sites or unauthorized file-sharing platforms, constitutes copyright infringement․ This is illegal and can result in fines or other legal penalties, as the official cookbook is protected by copyright law․
Only purchasing the PDF through official channels – like the publisher’s website or authorized retailers – ensures you are obtaining a legitimate copy․ Supporting the creators through legal means allows for continued development of similar content․
Respecting copyright protects both the intellectual property rights of the authors and the integrity of the Skyrim universe․

Content of the Skyrim Cookbook
Explore Tamriel’s cuisine! The Skyrim Cookbook PDF features 19+ recipes, Nordic dishes, and regional specialties, bringing the game’s food to life․
Overview of Recipes Included
The Skyrim Cookbook PDF boasts a diverse collection of recipes inspired by the world of Tamriel, specifically focusing on the province of Skyrim․ Expect to find dishes reflecting the hardy lifestyle of the Nords, alongside influences from other cultures within the game․ The official cookbook, and even fan-made versions, aim to recreate iconic in-game meals․
You’ll encounter recipes for staples like Sweetrolls, Apple Cabbage Stew, and various meats and breads․ Many recipes emphasize hearty ingredients and rustic preparation methods, mirroring the harsh climate of Skyrim․ Beyond the main courses, the cookbook also includes beverages and desserts, offering a complete culinary experience․ The PDF format allows for easy access to all these recipes, making it a convenient resource for any aspiring chef wanting to bring a taste of Skyrim to their table․
Nordic Cuisine in the Cookbook
Nordic cuisine dominates the Skyrim Cookbook PDF, reflecting the cultural heart of the game’s province․ Expect robust, warming dishes designed to sustain inhabitants through harsh winters․ Recipes heavily feature meats like venison and beef, alongside root vegetables and hardy grains․ Hearty stews and roasted meats are prevalent, embodying the practical and filling nature of Nordic fare․
The cookbook emphasizes simple, yet flavorful preparations, often utilizing readily available ingredients․ You’ll find recipes inspired by traditional Nordic cooking techniques, such as smoking and preserving․ Skyrim’s Nordic-inspired dishes prioritize substance over extravagance, mirroring the values of the Nords․ The PDF provides a detailed exploration of these culinary traditions, allowing fans to recreate authentic Skyrim flavors․
Recipes Inspired by Different Skyrim Regions
The Skyrim Cookbook PDF brilliantly captures Tamriel’s diverse culinary landscape, extending beyond Nordic fare․ Each region boasts unique dishes reflecting its climate, culture, and available ingredients․ Expect lighter, more refined recipes from the Elven forests, contrasting with the hearty meals of the Reach․ Morrowind’s influence introduces exotic spices and seafood-based creations․
The cookbook meticulously details recipes inspired by each province, offering a truly immersive experience․ From the sweet pastries of the Rift to the robust stews of Whiterun, every dish tells a story․ This regional approach allows fans to explore Skyrim’s world through its food, enhancing the game’s lore and providing a varied culinary adventure within the PDF․
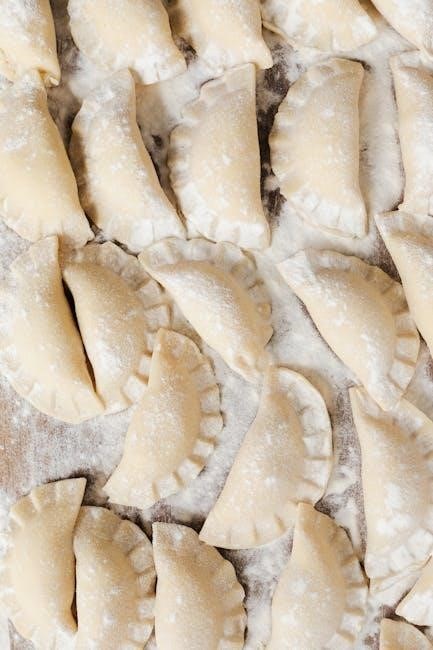
Detailed Recipe Breakdown: Sweetrolls
The Skyrim Cookbook PDF dedicates significant detail to the iconic Sweetroll, a staple for any aspiring Dragonborn baker․ The recipe isn’t simply a list of ingredients; it’s a carefully crafted guide to achieving that perfect, flaky texture and sweet, cinnamon-sugar glaze․ Instructions cover dough preparation, proofing times, and the crucial rolling and shaping techniques․
The PDF provides clear, step-by-step instructions, even for novice bakers․ Variations are sometimes included, offering options for different levels of sweetness or incorporating regional ingredients․ Expect precise measurements and helpful tips to avoid common pitfalls․ Mastering the Sweetroll recipe from the PDF is a rite of passage for Skyrim culinary enthusiasts!
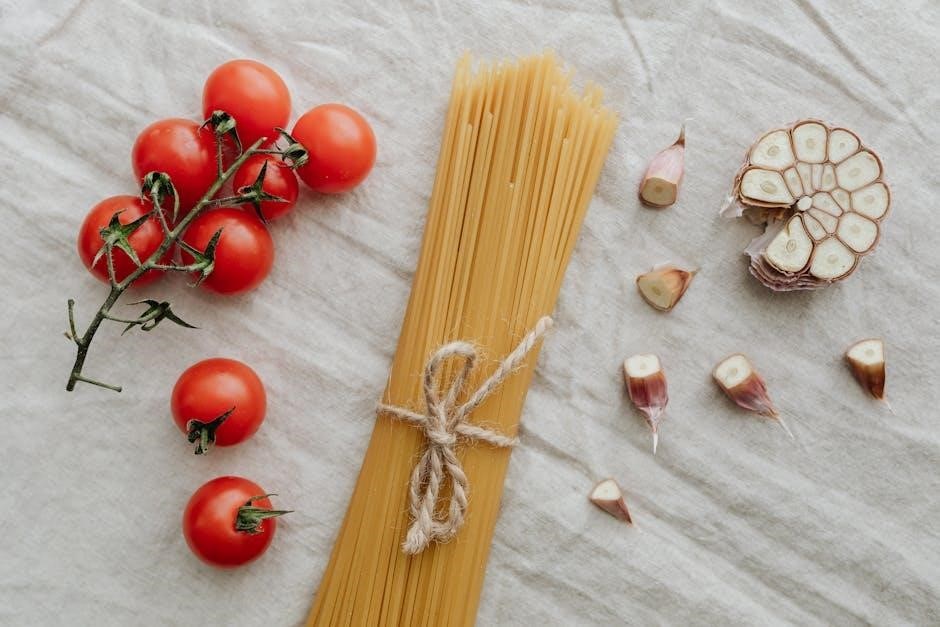
Detailed Recipe Breakdown: Apple Cabbage Stew
The Skyrim Cookbook PDF presents Apple Cabbage Stew as a hearty, rustic dish reflecting the Nord’s practical culinary approach․ Unlike the delicate Sweetroll, this recipe emphasizes substance and warmth, perfect for braving the harsh Skyrim climate․ The PDF details ingredient sourcing, suggesting alternatives if authentic components are unavailable․
Instructions focus on layering flavors – the sweetness of apples balancing the earthiness of cabbage and savory meats․ The recipe emphasizes slow cooking to tenderize the ingredients and meld the tastes․ Expect guidance on broth preparation and seasoning adjustments․ This stew embodies Skyrim’s culinary spirit, offering a filling and flavorful experience!

Using the Skyrim Cookbook
Unlock Tamrielic cuisine! The Skyrim Cookbook PDF empowers you to adapt fantastical recipes for modern kitchens, with ingredient substitutions and varying difficulty levels․
Adapting Recipes for Modern Kitchens
Bringing Skyrim’s feasts to life requires some culinary translation! The Skyrim Cookbook PDF presents recipes rooted in a fantastical world, often utilizing ingredients unavailable or difficult to source today․ Successfully adapting these dishes demands creativity and a willingness to substitute․
Don’t be afraid to modernize techniques; a slow cooker can emulate a traditional hearth, and pre-made doughs can simplify baking․ The key is understanding the essence of the dish – the hearty flavors of Nordic cuisine, the delicate sweetness of Elven desserts – and recreating that spirit with accessible components․
Consider the original intent of each ingredient․ If a recipe calls for a specific wild herb, research similar flavors available in your local market․ Embrace experimentation, and remember that the goal is to enjoy a taste of Tamriel, even if it’s not perfectly authentic!
Ingredient Substitutions
Navigating the Skyrim Cookbook PDF often means clever substitutions! Many ingredients are fictional or historically specific, requiring modern equivalents․ For example, “Snowberries” can be approximated with cranberries or currants, offering a similar tartness․ If “Jazbay Grapes” prove elusive, concord grapes or even dark plums can stand in․
Meat choices are also flexible․ “Venison” can be replaced with beef tenderloin or lamb, while “Rabbit” works well with chicken thighs․ Don’t hesitate to adjust spices; if a recipe calls for a rare herb, explore similar flavor profiles using readily available options like rosemary, thyme, or sage․
Remember to consider texture and flavor balance when substituting․ The goal isn’t a perfect replica, but a delicious dish inspired by the world of Skyrim!
Difficulty Levels of Recipes
The Skyrim Cookbook PDF caters to all culinary adventurers! Recipes range from incredibly simple, perfect for novice cooks – think basic stews and roasted meats – to quite complex dishes demanding advanced techniques․ Sweetrolls, while iconic, require some pastry experience, placing them in the intermediate category․
More challenging recipes often involve intricate sauces, layered pastries, or the preparation of unusual ingredients․ Expect longer cooking times and a greater need for precision․ The PDF doesn’t always explicitly state difficulty, so reading through the entire recipe first is crucial․
Don’t be intimidated! Start with easier recipes to build confidence, then gradually tackle more complex creations․
The Elder Scrolls Official Cookbook vs․ Fan-Made Versions
Compare official quality to fan creativity! The official Skyrim Cookbook PDF offers polished recipes, while fan versions provide unique interpretations and additions․
Comparing Content and Quality
The Official Elder Scrolls Cookbook, encompassing Skyrim, boasts professionally tested recipes and stunning photography, ensuring authenticity and ease of use․ It meticulously recreates dishes mentioned within the game, offering a comprehensive culinary journey through Tamriel․ However, it may lack the personalized touch and niche recipes found in fan-made versions․
Fan-made Skyrim cookbooks, often available as free PDF downloads, frequently showcase creativity and dedication from the community․ These versions might include recipes inspired by lore, character backstories, or even player experiences․ While offering unique content, the quality can vary significantly, with potential inconsistencies in instructions or ingredient availability․ Some fan creations prioritize quantity over refinement, potentially leading to less reliable results․
Ultimately, the choice depends on your priorities: professional polish and guaranteed success with the official version, or adventurous exploration and community-driven innovation with fan-made PDFs․
Benefits of the Official Cookbook
Authenticity and Reliability: The Official Elder Scrolls Cookbook provides meticulously tested recipes, ensuring successful results every time․ It’s a cornerstone for recreating Tamriel’s cuisine with confidence, avoiding the inconsistencies sometimes found in fan-made versions;
High-Quality Presentation: Featuring professional photography and a visually appealing layout, the official cookbook enhances the overall culinary experience․ It’s not just a recipe collection; it’s a beautiful tribute to the Skyrim universe․
Comprehensive Coverage: The cookbook spans across all of Tamriel, not solely focusing on Skyrim, offering a broader range of dishes and cultural influences․ This provides a richer, more immersive experience for dedicated fans․ Purchasing the official PDF guarantees a secure, legal download, free from potential malware risks associated with unofficial sources․
Benefits of Fan-Made Cookbooks
Creative Interpretation & Expansion: Fan-made Skyrim cookbooks often delve deeper into obscure lore and create recipes inspired by minor in-game references, offering unique culinary adventures beyond the official content․ They frequently showcase innovative adaptations and personal twists on existing dishes․
Community Driven & Accessible: These cookbooks are typically available for free download, fostering a collaborative spirit within the Skyrim community․ They represent a collective passion for the game and its world, offering a cost-effective alternative․
Niche & Specialized Recipes: Fan creations may focus on specific regions or character-themed meals, catering to dedicated players seeking highly specialized culinary experiences․ While quality varies, they provide a platform for experimentation and sharing within the fanbase․

PDF Format and Accessibility
Convenient & Portable: The Skyrim Cookbook PDF offers easy access to recipes, viewable on any device with suitable software, enhancing culinary exploration!
Advantages of the PDF Format
Portability and Convenience: The Skyrim Cookbook in PDF format provides unparalleled convenience, allowing aspiring chefs to access Tamriel’s recipes anywhere, anytime․ Unlike physical cookbooks, the PDF is easily stored on various devices – computers, tablets, and smartphones – making it a perfect companion for kitchen adventures․
Searchability and Navigation: PDFs enable quick searches for specific ingredients or dishes, streamlining the cooking process․ Hyperlinks within the document facilitate easy navigation between recipes and sections, saving valuable time․ This feature is particularly useful when exploring the diverse culinary landscape of Skyrim;
Preservation of Formatting: The PDF format ensures that the cookbook’s original layout, images, and fonts are preserved, delivering a visually appealing and authentic experience․ This is crucial for appreciating the artistry and detail of the recipes inspired by the game․
Software Required to Open the PDF
Adobe Acrobat Reader is the most widely used and recommended software for opening and viewing the Skyrim Cookbook PDF․ It’s a free, reliable program available for Windows, macOS, Android, and iOS, ensuring broad accessibility․ However, alternative PDF readers are also viable options․
Other PDF Viewers: Programs like Foxit Reader, SumatraPDF (Windows), and Preview (macOS) can seamlessly open and display the cookbook’s content․ Web browsers, including Chrome, Firefox, and Edge, often have built-in PDF viewers, eliminating the need for additional downloads․
Compatibility: Regardless of the chosen software, ensure it’s updated to the latest version for optimal performance and security․ Most modern devices and operating systems natively support PDF viewing, providing a hassle-free experience for culinary enthusiasts․
Accessibility Features of the PDF
Text-to-Speech: Many PDF readers, including Adobe Acrobat Reader, offer text-to-speech functionality, allowing users to listen to recipes instead of reading them – beneficial for visually impaired cooks․ Adjustable Font Sizes are crucial; users can increase font size for improved readability, catering to different visual needs․
Reflowable Text: Some readers support reflowable text, adapting the layout to fit various screen sizes and resolutions, enhancing accessibility on mobile devices․ Tagged PDFs, if available, provide a logical reading order for screen readers, aiding navigation․
Alternative Text: Images within the Skyrim Cookbook PDF should ideally include alternative text descriptions, enabling screen readers to convey visual information to users․ These features promote inclusivity, ensuring everyone can enjoy the culinary delights of Tamriel․
Troubleshooting PDF Issues
Fix common errors! This section details solutions for corrupted files, security restrictions, and software compatibility problems when accessing the Skyrim Cookbook PDF․
Common PDF Errors and Solutions
Encountering issues with your Skyrim Cookbook PDF? Several common errors can disrupt your culinary journey․ A frequent problem is a corrupted file, often resulting from an incomplete download or a virus․ Try re-downloading from a trusted source․ Another issue is the PDF failing to open, usually requiring an updated Adobe Acrobat Reader or alternative PDF viewer․
Security restrictions can also prevent access, particularly with PDFs downloaded from unofficial sources․ Check your PDF reader’s security settings․ If the file displays garbled text, ensure the correct font is installed․ For persistent errors, attempting to “repair” the PDF within Adobe Acrobat can sometimes resolve the issue․ Always scan downloaded files with antivirus software before opening․
Repairing Corrupted PDF Files
Is your Skyrim Cookbook PDF damaged? Don’t despair! Several methods can attempt repair․ Adobe Acrobat Pro offers a built-in “Reduce File Size” and “Save As” function, often resolving minor corruption․ Online PDF repair tools, while requiring caution regarding file uploads, can also be effective․ Downloading a fresh copy from the official source is the most reliable solution if available․
For more technical users, specialized PDF repair software exists, though results vary․ Before attempting repairs, create a backup of the corrupted file․ If the PDF contains crucial information, consider professional data recovery services․ Always scan any repaired PDF with antivirus software before use, especially if downloaded from unofficial sources, to ensure security․
Ensuring PDF Security
Protect your Skyrim Cookbook PDF! When downloading, prioritize official sources to minimize risks․ Always scan the file with reputable antivirus software before opening, guarding against potential malware․ Be wary of PDFs requiring excessive permissions or prompting unusual actions․ Consider using a PDF reader with built-in security features․
If the PDF contains personal information (though unlikely for a cookbook!), password-protect it․ Regularly update your antivirus and PDF reader software․ Avoid clicking suspicious links within the PDF․ If you suspect a compromised file, delete it immediately and report the source․ Prioritize safe download practices and vigilance to enjoy your culinary journey through Skyrim securely!

Beyond the PDF: Other Skyrim Culinary Resources
Expand your Skyrim feasts! Explore online communities, YouTube channels, and related cookbooks for more inspiration and recipes beyond the Skyrim Cookbook PDF․
Online Communities and Forums
Connect with fellow Skyrim culinary adventurers! Numerous online communities and forums are dedicated to recreating dishes from the game, often expanding upon recipes found within the Skyrim Cookbook PDF․
These platforms serve as vibrant hubs for sharing adaptations, ingredient substitutions, and personal experiences․ Enthusiasts frequently discuss challenges encountered while preparing complex recipes, offering solutions and encouragement․ Websites like Reddit host dedicated subreddits where users post photos of their creations and exchange tips․
Dedicated forums allow for in-depth discussions about the lore behind the food, exploring the cultural significance of dishes within Tamriel․ You’ll find collaborative recipe development, ensuring a constantly evolving culinary landscape inspired by the Skyrim Cookbook PDF and beyond!
YouTube Channels Dedicated to Skyrim Cooking
Visually immerse yourself in the world of Skyrim cuisine! Several YouTube channels specialize in bringing the recipes from the Skyrim Cookbook PDF to life through engaging video tutorials․
These channels often demonstrate step-by-step cooking processes, providing clear instructions and helpful visual cues․ Many creators focus on adapting the recipes for modern kitchens, offering practical advice on ingredient sourcing and preparation techniques․ Viewers can witness the transformation of virtual dishes into tangible culinary delights․
Beyond simply following the Skyrim Cookbook PDF, some channels explore the lore behind the food, adding a layer of immersive storytelling․ Expect to find recipe challenges, themed cooking streams, and vibrant communities of fellow Skyrim-inspired chefs!
Related Cookbooks and Resources
Expand your culinary journey beyond the Skyrim Cookbook PDF! For fans of fantasy-inspired cuisine, several other cookbooks offer similar immersive experiences․ The official Elder Scrolls cookbook provides a broader range of recipes from across Tamriel, encompassing all provinces and cultures․
Furthermore, exploring cookbooks focused on medieval or Nordic cuisine can offer valuable insights into the historical inspirations behind Skyrim’s food․ Websites dedicated to historical cooking and food lore provide additional context and recipes․
Don’t forget online forums and communities where fans share their own adaptations and creations based on the Skyrim Cookbook PDF, fostering a collaborative and creative culinary landscape!