
Carport Assembly Instructions: A Comprehensive Guide
Embarking on carport assembly requires careful planning and execution, ensuring a durable and protective structure for your vehicles and belongings. This guide details
the entire process, from initial preparation to final finishing touches, offering a streamlined approach for a successful installation. Outdoor sheds and carports
are known for their versatility, offering benefits like storage and vehicle protection, and this guide will help you maximize those advantages.
Successfully assembling a carport is a rewarding project that enhances your property’s functionality and value. This undertaking, however, demands a methodical approach, beginning with a thorough understanding of the process and diligent preparation. Before commencing, familiarize yourself with the entire scope of work, from site preparation and foundation laying to frame assembly and roofing installation.
Carports offer versatile solutions for vehicle protection and storage, shielding against the elements and potential damage. Proper installation ensures longevity and stability, safeguarding your investment. Many vehicles are left unprotected, exposed to weather, making a carport a valuable addition. This guide provides a comprehensive roadmap, breaking down each step into manageable phases.
Remember, a level surface is crucial for a quality installation. Whether utilizing a concrete slab, gravel pad, or paver foundation, meticulous attention to detail is paramount. Following these instructions carefully will result in a robust and reliable carport structure, providing years of dependable service.
Understanding Your Carport Kit
Upon receiving your carport kit, the initial step involves a comprehensive inventory to ensure all components are present and accounted for. Carefully cross-reference the included parts list with the physical contents of the package, noting any discrepancies immediately. This proactive approach prevents delays and frustrations during the assembly process.
Familiarize yourself with each part – posts, beams, rafters, roofing sheets, and hardware – understanding their individual roles within the overall structure. The kit should include detailed diagrams illustrating the assembly sequence and proper component placement. Take time to study these diagrams before beginning any physical work.
Understanding the specific materials used in your kit is also crucial. Different carports utilize varying types of metal, wood, or composite materials, each requiring specific handling and installation techniques. Knowing these nuances will contribute to a secure and long-lasting carport structure. A well-understood kit is the foundation for a smooth assembly.
Parts List Verification
A meticulous parts list verification is paramount before commencing carport assembly. Lay out all components on a clear, spacious surface, grouping similar items together. Systematically compare each item against the detailed parts list provided with your kit, confirming quantities and identifying each piece accurately.
Pay close attention to the hardware – bolts, screws, washers, and connectors – as these are often small and easily misplaced. Verify that you have the correct types and quantities of each fastener. Note any missing or damaged parts immediately and contact the manufacturer or supplier for replacements before proceeding.
Don’t assume anything is extra; each component serves a specific purpose. Discrepancies at this stage can lead to significant issues later in the assembly process. Document any shortages or damages with photographs for easy communication with the supplier. A thorough verification ensures a complete and frustration-free build.
Tools Required for Assembly

Successful carport assembly hinges on having the right tools readily available. A comprehensive toolkit will streamline the process and ensure secure construction. Essential tools include a power drill with various bit sizes for pre-drilling and fastening, a socket wrench set for tightening bolts, and a level to guarantee a perfectly aligned structure.
A measuring tape is crucial for accurate measurements, while a rubber mallet assists with gently securing components. Safety glasses and work gloves are non-negotiable for personal protection. Depending on the foundation type, you might also need a shovel, concrete mixer, or tamper.
Consider a circular saw or reciprocating saw for any necessary cutting of materials. Having a ladder or step stool provides safe access to higher areas during roof installation. Organizing your tools beforehand will significantly improve efficiency and prevent frustrating delays during the assembly process.
Site Preparation: Laying the Foundation
Proper site preparation is paramount for a stable and long-lasting carport. Begin by carefully selecting a suitable location, considering factors like accessibility, drainage, and proximity to existing structures. Before commencing any construction, thoroughly clear the designated area of all debris, vegetation, and obstructions. This ensures a clean and level workspace.
Crucially, the ground must be level to prevent structural issues. If the site isn’t naturally level, grading may be necessary. Before installing your carport, ensure you have a flat surface; concrete is optimal for guaranteeing quality installation. The installation process generally begins with site preparation, involving clearing debris and leveling the ground.
Accurate leveling is vital for the carport’s structural integrity and aesthetic appeal. Take your time during this phase, as a solid foundation is the cornerstone of a successful carport installation. A well-prepared site will significantly simplify the subsequent assembly steps.
Choosing a Suitable Location
Selecting the right location for your carport is a critical first step. Consider accessibility for vehicles – ensure ample space for maneuvering in and out. Proximity to your house can offer convenience, especially during inclement weather, but also consider potential impacts on views or landscaping.

Evaluate drainage patterns. Avoid areas prone to water accumulation, as this can compromise the foundation and lead to structural damage. Check for underground utilities – contacting your local utility companies before digging is essential to prevent accidental damage and ensure safety.
Think about future needs. Will you potentially need to expand the carport or add features like side walls? Ensure the chosen location allows for such modifications. Not all homes have garages, so a well-placed carport offers vital protection from the elements. Prioritize a spot that maximizes protection and ease of use.
Ensuring a Level Surface
A perfectly level surface is paramount for a stable and secure carport structure. Even slight inclines can cause significant issues during assembly and compromise the long-term integrity of the carport. Begin by thoroughly assessing the chosen site for any unevenness or slopes.
Utilize a long level and straight edge to identify high and low spots. For minor imperfections, you can use compacted gravel or soil to build up lower areas. More substantial slopes may require professional grading or excavation. Before installing, ensure you have a flat surface, as this guarantees quality installation.
Remember, the foundation – whether concrete, gravel, or pavers – must be built upon a level base. Taking the time to properly level the ground will save you considerable headaches during the assembly process and ensure a lasting, reliable carport. A solid, level foundation is the cornerstone of a successful installation.

Foundation Options
Selecting the appropriate foundation is crucial, impacting carport stability and longevity. Several options cater to different budgets, site conditions, and permitting requirements. A concrete slab provides the most robust and permanent solution, offering excellent stability and resistance to the elements. However, it’s also the most expensive and labor-intensive option, requiring professional pouring and a 7-10 day curing period.
Gravel pads present a cost-effective alternative, particularly suitable for temporary or less demanding applications. Proper compaction and drainage are essential for gravel foundations to prevent settling and maintain stability. Paver foundations offer a balance between cost and aesthetics, providing a relatively stable surface with a more finished look.

Consider local building codes and soil conditions when choosing a foundation. Ensure adequate drainage to prevent water accumulation, which can compromise the foundation’s integrity. Careful foundation selection sets the stage for a successful carport installation.
Concrete Slab Foundation
A concrete slab foundation delivers unparalleled stability and durability for your carport, ensuring long-term protection against weather elements. This method involves pouring a reinforced concrete slab, typically 4-6 inches thick, directly onto a prepared base of compacted gravel. Accurate measurements and leveling are paramount during preparation to guarantee a perfectly flat surface for assembly.
Before pouring, install rebar or wire mesh for reinforcement, enhancing the slab’s strength and resistance to cracking. Following the pour, allow adequate curing time – generally 7-10 days – before proceeding with carport frame installation. Proper curing prevents premature weakening and ensures optimal concrete strength.
Concrete slabs require professional expertise for optimal results, potentially increasing initial costs. However, the long-term benefits of a robust, permanent foundation often outweigh the investment, providing a solid base for years to come.
Gravel Pad Foundation
Establishing a gravel pad foundation presents a cost-effective and relatively simple alternative to concrete, particularly suitable for temporary or less demanding carport installations. This method involves excavating the designated area to a depth of approximately 6-12 inches, then filling it with layers of compacted gravel.
Begin with a base layer of larger gravel for drainage, followed by progressively smaller gravel sizes, compacting each layer thoroughly with a plate compactor. Proper compaction is crucial to prevent settling and ensure a level surface. A geotextile fabric layer beneath the gravel can further enhance stability and prevent weed growth.
While less permanent than concrete, a well-prepared gravel pad provides adequate support for many carport designs. However, it may require periodic maintenance, such as adding more gravel to maintain the desired level. Before installing, ensure the surface is perfectly level for quality installation.
Paver Foundation
Constructing a paver foundation offers an aesthetically pleasing and durable alternative to concrete or gravel, providing a stable base for your carport. This method involves preparing a level base of compacted gravel, similar to a gravel pad, but with added attention to detail for a smooth, even surface.
After the gravel base is established, a layer of sand is spread and leveled to create a bedding layer for the pavers. Pavers are then carefully laid, ensuring tight joints and a consistent pattern. Polymeric sand is often used to fill the joints, locking the pavers in place and preventing weed growth.
Paver foundations are relatively easy to install and can be customized with various paver styles and colors. They offer good drainage and require minimal maintenance. However, proper base preparation is essential to prevent shifting or settling over time. Before installing, ensure a flat surface to guarantee quality installation.
Assembling the Carport Frame

With the foundation prepared, the carport frame assembly begins, forming the structural skeleton of your shelter. This stage typically involves installing posts, which are securely anchored to the foundation using appropriate hardware – concrete anchors for slabs, or ground screws for other surfaces.
Once the posts are firmly in place, beams are attached, connecting the posts and establishing the carport’s width and length. Following beam installation, rafters are added, spanning between the beams to create the roof’s supporting structure. Precise alignment and secure fastening are crucial at this stage, ensuring the frame’s stability and ability to withstand weather conditions.
Carefully follow the kit’s instructions, utilizing the provided hardware and tools. Double-check all connections for tightness and proper alignment. A well-assembled frame is the cornerstone of a durable and long-lasting carport, protecting your vehicles for years to come.
Post Installation & Anchoring
The initial step in frame assembly is the precise installation of the carport posts, which are the vertical supports bearing the entire structure’s load. Begin by positioning each post according to your plans, ensuring accurate spacing and alignment with the foundation.
Anchoring methods vary depending on the foundation type. For concrete slabs, use robust concrete anchors, drilling pilot holes and securing the posts with appropriate bolts. Gravel or paver foundations require ground screws, driven deep into the ground to provide a firm hold.
Verify each post is perfectly plumb (vertical) using a level before fully tightening the anchors. Proper anchoring is paramount; it resists wind uplift and ensures the carport’s stability. A shaky foundation leads to structural issues, so take your time and double-check every connection.
Beam and Rafter Attachment
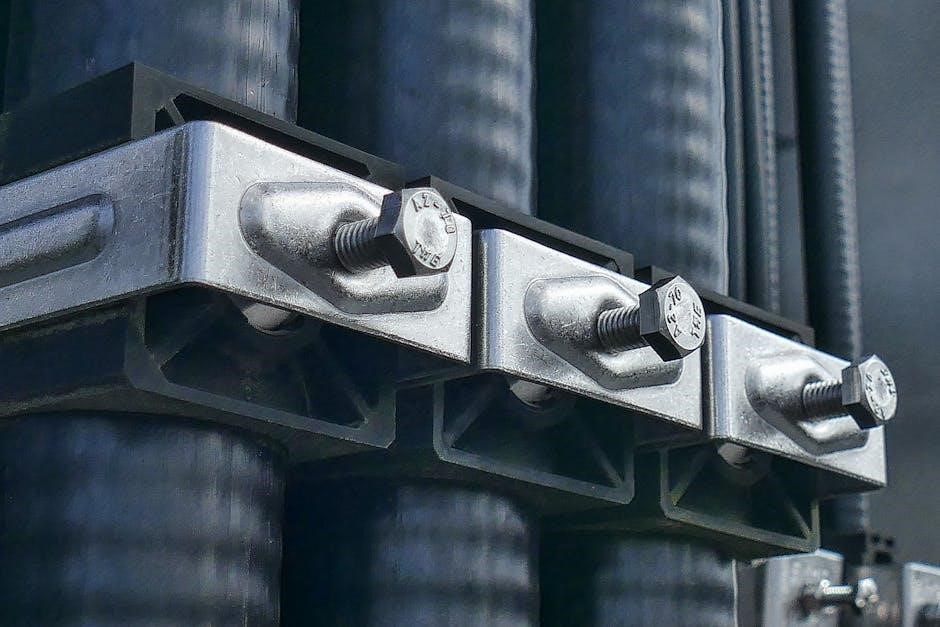
Once the posts are securely anchored, the next phase involves attaching the beams and rafters, forming the carport’s skeletal framework. Beams, typically horizontal supports, connect the posts, providing primary load distribution. Use heavy-duty brackets and bolts designed for structural applications, ensuring a tight and secure fit.
Rafters, angled supports extending from the beams to the ridge, create the roof’s slope. Precise alignment is crucial for a structurally sound and aesthetically pleasing carport. Employ appropriate connectors – often metal plates or gussets – and follow the manufacturer’s specifications for fastener size and placement.
Double-check all connections for tightness and stability. A well-connected frame is essential for withstanding weather elements and ensuring the carport’s longevity. Remember, a solid frame is the foundation for successful roofing installation.
Roofing Installation
With the carport frame securely assembled, the roofing installation phase begins, providing essential protection from the elements. Two common roofing materials are sheet metal and shingles, each requiring specific techniques.
Sheet Metal Roofing – Horizontal Installation: Begin by laying the first sheet metal panel, ensuring proper overlap to prevent water intrusion. Secure the panels using specialized screws with rubber washers, preventing leaks. Work horizontally, overlapping each subsequent panel, and fastening it securely to the rafters. Proper sealing of seams is vital for a watertight roof.
Shingle Roofing – Application Techniques: Start at the bottom edge of the roof, applying the first row of shingles with a slight overhang. Overlap subsequent rows, following the manufacturer’s recommended exposure. Secure each shingle with roofing nails, ensuring they penetrate the rafters. Proper underlayment is crucial for moisture protection before shingle application.
Sheet Metal Roofing – Horizontal Installation
Commencing with sheet metal roofing demands precision for a durable, weather-resistant shelter. Begin by carefully positioning the initial sheet metal panel, ensuring a consistent overlap – typically one to two corrugations – to effectively channel water runoff and prevent potential leaks. Utilize specialized self-tapping screws equipped with rubber washers; these create a watertight seal while securely fastening the panel to the carport’s rafters.
Progress horizontally across the roof structure, meticulously overlapping each successive panel. Consistent overlap is paramount. Fasten each panel firmly, ensuring screws are driven straight and don’t over-tighten, which could damage the metal. Pay close attention to sealing all seams and edges with appropriate sealant to eliminate any pathways for water penetration.
Remember to account for wind direction during installation, orienting the panels to minimize wind uplift. Proper installation guarantees longevity and protection.
Shingle Roofing – Application Techniques
Applying shingles requires a systematic approach for a weatherproof carport roof. Start by laying down roofing felt or synthetic underlayment, securing it with staples, to provide a moisture barrier. Begin at the lowest edge of the roof, working upwards, and install the first row of shingles, ensuring a slight overhang for effective water shedding.
Subsequent rows should overlap the previous ones, concealing the fasteners from the row below. Use roofing nails, driven straight and flush with the shingle surface, avoiding overdriving which can compromise the seal. Stagger the joints between shingles in each row to enhance structural integrity and prevent water intrusion.
Proper sealing around vents, chimneys, or other roof penetrations is crucial. Apply roofing cement generously to create a watertight barrier. Consistent application and attention to detail are key to a long-lasting, reliable shingle roof.
Carport Installation Timeline
Planning a carport installation requires understanding the time commitment involved. Foundation preparation typically spans 1-2 days, but crucially, concrete foundations necessitate a curing period of 7-10 days before proceeding. This curing phase is vital for structural integrity and prevents premature stress on the carport frame.
Once the foundation is adequately cured, frame assembly can commence. With a team of 2-3 people, this phase generally takes 6-12 hours, depending on the carport’s size and complexity. Efficient teamwork and adherence to the assembly instructions are key to minimizing this timeframe.
Finally, finishing touches, including gutter installation and optional sidewall additions, will add an additional half to a full day to the overall project. Remember to factor in potential delays due to weather or unforeseen issues, allowing for flexibility in your schedule.
Foundation Preparation (1-2 days + 7-10 days curing)
Establishing a solid foundation is paramount for carport stability and longevity. This initial phase typically requires 1-2 days for site clearing, leveling, and formwork construction, depending on the chosen foundation type – concrete slab, gravel pad, or pavers. Accurate leveling is crucial; even slight imperfections can compromise the carport’s structural integrity.
For concrete slab foundations, pouring and initial setting take a day, but the critical step is the subsequent curing period. Allow a minimum of 7-10 days for the concrete to reach sufficient strength. This curing process prevents cracking and ensures the foundation can adequately support the carport’s weight and withstand environmental stresses.
Prior to pouring concrete, ensure proper drainage is considered to prevent water accumulation. A well-prepared foundation guarantees a quality installation and long-term performance of your carport structure.
Frame Assembly (6-12 hours with 2-3 people)
With a prepared foundation, the carport frame assembly commences, typically requiring 6-12 hours with a team of 2-3 individuals. This stage involves meticulously connecting posts, beams, and rafters according to the kit’s instructions. Precise alignment is vital for structural soundness and proper roofing installation.
Begin with post installation and secure anchoring to the foundation, ensuring they are plumb and correctly spaced. Subsequently, attach beams and rafters, utilizing appropriate hardware and following torque specifications. Double-check all connections for tightness and stability throughout the process.
Effective teamwork and adherence to the manufacturer’s guidelines are essential for a smooth and efficient frame assembly. A well-constructed frame forms the backbone of your carport, providing the necessary support for the roofing and ensuring its long-term durability.
Finishing Touches & Considerations
Once the carport structure is complete, several finishing touches enhance its functionality and aesthetic appeal. Gutter installation is highly recommended to effectively channel rainwater away from the structure and prevent water damage to the foundation and surrounding areas.
Optional side wall installation provides additional protection from the elements, creating a more enclosed space. Consider local building codes and regulations when deciding on side wall materials and installation methods. Proper sealing around all edges and joints is crucial to prevent water intrusion.
Furthermore, inspect the entire carport for any loose hardware or potential weak points. Address these issues promptly to ensure long-term stability and safety. Regular maintenance, including cleaning and inspections, will prolong the carport’s lifespan and maintain its protective qualities.
Gutter Installation
Proper gutter installation is vital for diverting rainwater away from your carport’s foundation, preventing potential water damage and erosion. Begin by selecting a gutter system compatible with your carport’s roof pitch and material – aluminum or vinyl are common choices.
Carefully measure the carport’s roofline to determine the necessary gutter length and the number of downspouts required for efficient drainage. Attach gutter hangers securely to the fascia board, ensuring they are evenly spaced to support the gutter’s weight.
Seal all seams and joints with a waterproof sealant to prevent leaks. Position downspouts strategically to direct water away from the foundation and surrounding landscape. Regularly clean gutters to remove debris and maintain optimal water flow, extending the life of your carport and preventing costly repairs.

Side Wall Installation (Optional)
Adding side walls to your carport enhances protection from the elements, providing increased shelter from wind, rain, and sun. This step is optional but significantly boosts the functionality of your structure.
Begin by framing the side walls using pressure-treated lumber, ensuring the frames are square and securely attached to the carport’s posts. Consider local building codes regarding wall height and materials. Cover the frames with siding materials like wood, metal, or vinyl, chosen for durability and aesthetic appeal.
Securely fasten the siding to the frames, overlapping each piece appropriately to prevent water penetration. Ensure proper sealing around windows or doors if incorporated into the side walls. Side walls transform a basic carport into a more enclosed and versatile space, offering greater protection for your vehicles and stored items.
Safety Precautions During Assembly
Prioritizing safety during carport assembly is paramount to prevent injuries and ensure a smooth process. Always wear appropriate personal protective equipment (PPE), including safety glasses, work gloves, and a hard hat, especially when working with power tools or at heights.
Ensure a stable work environment by clearing the assembly area of obstacles and debris. When lifting heavy components, utilize proper lifting techniques – bend your knees, keep your back straight, and ask for assistance when needed. Securely anchor ladders and scaffolding to prevent accidental falls.
Exercise caution when using power tools, following manufacturer’s instructions and maintaining a safe distance from others. Be mindful of overhead power lines and underground utilities before digging or installing posts. Regularly inspect tools for damage and address any issues promptly. A safe assembly process guarantees a secure and long-lasting carport.
Troubleshooting Common Assembly Issues
Encountering difficulties during carport assembly is common, but most issues are easily resolved with a systematic approach. If posts aren’t level, re-check the foundation and use shims to achieve proper alignment. Misaligned beams or rafters can often be adjusted by loosening bolts and re-tightening them after correction.
For roofing issues, ensure proper overlap of sheet metal or shingles to prevent leaks. If fasteners are stripping, use larger diameter screws or pre-drill pilot holes. Difficulty with component alignment may indicate incorrect parts identification – revisit the parts list to verify.
Remember to double-check all connections and tighten bolts securely. If you’re unsure about any step, consult the assembly manual or seek assistance from a qualified professional. Addressing these common issues promptly ensures a structurally sound and weather-resistant carport.